Recently, I have been receiving requests from manual therapists for case study examples that may give the therapist guidance in providing treatment to their patients. As each condition and each patient is unique, it is quite difficult to choose one or two as examples as a general guideline…it simply doesn’t exist.
Rather than discuss a case example, I have decided to run through a typical sequence of investigation or assessment that I start with and expand from.
The following is information on my perspective and on how I assess and treat. This is meant as a possible guide for you to follow if you wish or pick apart and infuse into your existing assessment & treatment. Everyone has their perspective on what should be done and in what order. No one is wrong. We are all unique and different which makes our perspectives individual. If I can provide a new perspective that improves your quality of assessment or treatment, then my goal is achieved.
I’ve taught clinical orthopaedic assessment for many years and have found that adding listening techniques to my assessments has greatly improved my ability to pinpoint a primary restriction or initial cause of the patients’ complaint. I regularly have new patients who have seen “everyone” and have been referred to me as a last resort. I will not be addressing details of orthopaedic assessment or listening skills at this time as this is honestly too large of a subject matter.
If you are not skilled in the art of orthopaedic assessment, Whitney Lowe has amazing educational seminars in this area. It’s great information that is invaluable to your practice. There are many texts written on orthopaedic assessment. Buy a few. Read and reread them. Have them in your treatment room & use them while you are assessing your patient. The educational system you received gave you the basics. Now it’s time for you to improve upon that base.
Education on listening techniques is a little harder to find. Cranial and visceral courses are great for providing this information, but quite honestly, I’ve searched and scoured for almost a decade acquiring texts and little snippets of gold. Many times the information came from interviews with mentors that have been practicing for 30yrs or more.
I have a passion for “Alignment.” If you are interested in finding out more about “My Story” and how I came to have this passion for alignment, you’ll find it here.
Alignment of the form is key. Creating a proper environment within the body, allows it to function more efficiently. This gives it the opportunity to allow the innate healing properties to work more effectively and is my goal with every patient.
Thomas Schooley, DO wrote:
“It’s not perverted function but a wrong environment that results in the distorted appearance of function. Function is always true to its environment. Function is dependent upon its environment. Therefore, any change in any part of the environment that is not in tune or balance will apparently distort the function of the matter so involved.”
Many dysfunctional systems of the body can cause a wide range of complaints and it can be quite overwhelming to investigate. I always am asking “Where is the primary restriction?” It may be cranially, viscerally, fascially, in the ligamentous articular system, it may be in the skin. It’s quite interesting how many times I’ve forgotten to listen to the body, gotten frustrated, lost, overwhelmed and missed the thing that was in right in front of me all the time; the skin or superficial fascia.
The words of James Jealous, DO ring through my mind almost every treatment of the day:
“The quieter the mind, the stiller the hands, the less movement we make, the more we are able to perceive involuntary movement.”
If you are finding that your patients’ bodies are leading you into areas that you have no formal training, take it as a sign that it’s time to educate yourself in this area. If you are getting more patients complaining of visceral dysfunctions, take a visceral course. If post concussions start coming to you, it’s time to take a cranial course. Whether you believe in a technique or not, take the course for the information and you’ll be surprised at the changes that happen in your practice.
Principles
Injuries to structures may have happened years ago. The fascial system contracts in a fashion similar to smooth muscle. It has incredible strength and endurance in creating contraction. Fascia has a tensile strength similar to steel, 2000lbs/sqr inch. You can’t force through it. You have to “co-operate” with it to have any positive effects.
One of the basic & safest principles I treat by is utilizing least invasive to most invasive techniques. Small changes can result in disproportionately large changes! I’ve never started a series of treatments or an individual treatment with an iliacus, psoas or pelvic diaphragms release. It’s far too invasive, physically, mentally and emotionally on the patient.
Injuries can make dysfunctional alteration to the mechanoreceptors and ligamentomuscular reflex. These alterations have the ability to change how the body perceives proprioception and kinaesthetic information. This eventually leads to inefficient gait, dysfunctional movement patterns and tissues being over worked and underpaid for jobs they were not meant for. This all leads to a decreased tissue tolerance and an increased pain/tension cycle.
Patients can present with overwhelming symptoms from any number of injuries forming intricate combinations of dysfunction. Many have been this way for years and have only received improper or inefficient, unfocused therapies. This will most likely be the first time they receive a very specific focused treatment so you must make them aware of the effects and side effects of the treatment. They must always give informed consent to the treatment.
With every patient, you must be concerned with the state of the condition. Remember your basic guidelines of treatment being provided in acute, sub-acute, chronic and what the indications and contraindications for treatments are. What medications is the patient taking and is there any hardware post surgery that you need to be informed about. What are the possible effects and side effects of the treatment that you and your patient have agreed upon?
I’ve found that post treatment, for about 72hrs, patients will feel many new sensations. This can be the minimum time limit for some patients. They may have discomfort in areas that before treatment were not bothering them or they may have an increased amount of discomfort in their initial complaints area(s). They may generally feel as if something has gone wrong from the treatment and are concerned when returning for their next appointment. Others have amazing results of improvement that make life changing alterations to their environment & function that increases their quality of life. Be prepared for both and expect nothing.
General Thoughts on Treatment
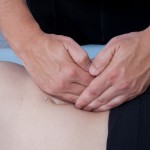
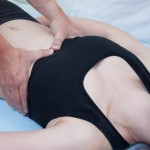
At the beginning of a typical treatment, I perform a precise assessment first of all regions. Once I have a somewhat complete overview of the whole dysfunction, an attempt to put the pieces together or connect the dots is made.
Place yourself in their dysfunction. Move your body into an over exaggeration of how their body presents to illustrate the extreme inefficiency that your patients body is attempting to correct. Many times the patient confirms that that is exactly how they feel. Doing this allows for you to empathize and discover small issues that may have been missed by others. Many times, I’ve placed myself into the patients’ dysfunctional pattern and immediately felt pain or discomfort in an area that the patient was unaware or forgotten they had due to the other “more pressing” pain/discomfort. Your patients will appreciate the time it takes to connect the dots and appreciate that you can validate their complaints. Take your time, it’s worth the effort.
One of the hardest things to teach a manual therapist is to take their hands off of their patient. Once a change has been made to the system, that system needs a little time to make the necessary adjustments so you can continue the treatment.
Make a change, take your hands off the patient, let them shift, continue treatment.
Remember that you are making a change to not just the musculoskeletal or fascial system, but to the CNS. This Autonomic Nervous System shift can happen in a number of ways; blinking eyes, eye pattern changes, parasympathetic breaths (deep sigh), having the patient actually physically move to a more comfortable position on the table etc… It can happen quickly, or it may take a moment, but usually not too long.
Circulatory Pulses
I have a habit of assessing the pulses in the extremities of the complaints. This is a great way of listening to the body telling you where there is restriction that is causing decreased circulation. It’s a nice way to localize one area out from the rest and provide a possible starting point.
For complaints of the lower body, I start at the dorsal pedis and move up to the inguinal making notes of rate & amplitude or strength. I compare not only from side to side, but also the one above and below on the same side.
If the pulse is strong at the inguinal, but weak or difficult to find at popliteus, we can gather that there is some constricting structure in between. Even though the patient may complain of discomfort in the foot, it may be in part due to this restriction. This is my process for all extremities. If the environment is dysfunctional, so too will be the tissue living in it.
Lower Extremities
Feet
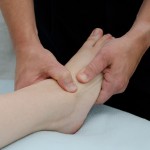
It seems that no matter what the complaint, I usually start at the feet; not always but in most cases I find it’s good to create a functional base for the rest of the form to function upon. Any time a patient has complaints of lower back and pelvis dysfunction, I start my investigation at the feet. If the complaint is upper body or extremity, I commonly start with the respiratory diaphragm and anterior thorax.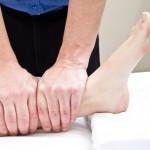
Is one or the other foot pronating or supinating? It’s always interesting when one pronates and the other supinates. It’s as if the feet want to go in one direction and the rest of the body wants to go in the opposite direction. How are the talus’s sitting; similar to the feet or opposite? Are they in an anterior or posterior position, are they rotated in any direction?
Once I have this information, I next look to the intertarsal, tarsometatarsal & metatarsophalangeal joints. Thomas Myers Divides the foot into two regions. The medial aspect of this region is referred to as the “Toe Foot Complex”, derived from the dancing community. The “Toe Foot Complex” was designed to withstand the body’s primary weight. This complex is made of the talus, navicular, all 3 cuneiforms and their respective phalanxes.
The lateral aspect of the foot is referred to as the “Heel Foot Complex.” This region is made up of the Calcaneus, cuboid, 4th & 5th phalanxes. In terms of function, the medial arch bones can be seen to be the major weight bearing ‘canoe’, while the outer arch bones act like an ‘outrigger’, balancing and stabilizing but not bearing as much weight.
Where is/are the restriction(s)? In L.A.S.T. courses, we talk about becoming precise with your palpation or sensing of imbalances within the system. Don’t hunt for the lesion(s), let it/them come to you.
Leg
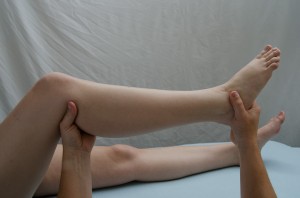 Now that you have found imbalances in both feet, move up to the interosseos membrane of the legs. This membrane is connected to the membranes and tissues of the foot.
When an injury occurs in the foot, there can be torsional strains in this membrane. Once located move to the proximal tibiofibular joint. It should have ant./post./ inf./sup. movements available. Remember that it’s attached to the foot. As you invert the foot, the fibula will move inferomedially and with eversion the fibula moves superolaterally.
Are there fascial constrictions that you can locate in the anterior, lateral or posterior compartments of the leg. The triceps surae and plantar fascia have an amazing ability to contract causing the foot to be in a position of constant plantarflexion, which forces the talus anteriorly. This will limit dorsiflexion not only due to muscular/fascial restrictions, but also due to coupling motions of the tibiotalar joint. Moving the foot into dorsiflexion, the talus will contact the anterior portion of the tibia with a hard end feel, preventing this action.
Knees
The knee system gives you an amazing amount of information. I can sit and acquire information for 20-30mins at a time before I’ll make any changes to it. Structures that are common contributors to complaints are the ACL, PCL, both meniscuses, MCL, LCL, bursas, joint capsules, fascial membranes, ligamentous tissues within the joint, surrounding musculature imbalances and so on. I typically find that a number of these structures work in combination to cause rotational dysfunction in the system. A medial meniscus can sit slightly anteriorly restricting flexion & extension; the popliteus can be hypertensive, not allowing the joint to extend fully; dysfunction in the ligamentomuscular reflex can result in muscular imbalances that are inefficient for locomotion.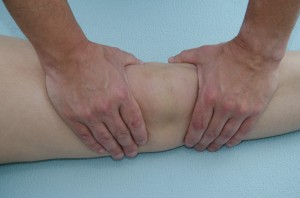
Knee systems need to be thoroughly investigated. Take your time and make small changes to the system. Don’t make grand changes in an attempt to correct every dysfunction in every tissue. Some tissues are dysfunctional in reaction to the primary dysfunctional tissue which may or may not be within the knee.
Releasing dysfunctional tension in the popliteus muscle has the potential to make grand gait alterations.
Remember:
“Small changes can result in disproportionately large changes!”
Hip & Pelvis
Moving into the hips, examples of possible causes of complaints can be osseos differences such as retro or ante version femoral heads, pelvis obliquities, SI dysfunctions, pelvic floor imbalances, ASIS inflairs & outflairs, rotational patterns, sacral positions, ischium positions, pubic symphysis positions and so on. As stated before, it can be quite overwhelming making an effort to be as specific or precise as possible with your assessments. Injuries to these structures may have happened years ago.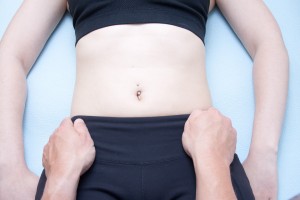
Typically I prefer to correct the SI dysfunction or diagonal axis, move to the ASIS inflair/rotation, then onto the ischiums and sacrotuberus ligament. I will treat ASIS pelvic torsion, external rotators & gluteus muscles. Keeping in mind the effect small changes have, sometimes treating an inguinal ligament will change the position of the ASIS, Pubis symphysis and respiratory diaphragm.
In dealing with pelvic concerns, there is always a visceral component that may be primary or secondary. Visceral dysfunctions in motility and mobility are far outside this discussion. I encourage all of you to educate yourself in with the various dysfunctions these tissues can suffer from and create. Please take a Barral course. It will change your whole perspective and enhance your practice in ways you can not imagine.
Conclusion
I hope that I have been able to serve you in some way with this information, be it a completely new perspective into your patients, be it some new thoughts about how to approach a treatment or provide you with a review and acknowledgement that what you are doing, as far as I’m concerned, is having an amazingly positive impact in improving the quality of life for your patients.
As I stated before, everyone has their perspective on what should be done in what order. No one is wrong.
We are all unique and different which makes our perspectives individual. If I can provide a new perspective that improves your quality of assessment or treatment, then my goal is achieved.
This concludes Part 1 of this series.
In the next segment, I will endeavor to provide some perspective in assessing & treating the upper body and extremities.

